Über mich

Hallo zusammen! Ich freue mich, daß ihr meinen Blog gefunden habt. Und ja ihr lest RICHTIG - ein MANN im Bastelreich. Ich habe schon seit Kindheit gebastelt und mit 4 Jahren einen Zeichenwettbewerb gewonnnen. :-) Seit dem habe ich vieles ausprobiert. Heute sage ich auch nicht mehr Basteln sondern für mich ist das ein Kreatives Gestalten. Hi everyone! Hooray - you found my blog. YES it´s true - a man in the world of craft. I do handcraft since my childhood and with 4 years I won a draw contest. I tried and done a lot of things. My favorite is still doing cards. P.S. Sorry about my "not perfect" english - I´m Austrian! ;-)

Dienstag, 30. August 2011

Clean und simple

Halli hallo zusammen!
Nachdem es die letzten Tage mehr als heiss gewesen ist habe ich nicht soviel zum zeigen. Da war nur schwitzen und nichts tun angesagt.
So Karten wo nicht viel drauf ist nennt man ja Clean und simple - das war das Motto bei der Affenhitze. *lach*
Hi all!
The last few days here in Austria it was that hot that my creativity was sweating away. So I can show you only a few cards. They named clean and simple...and that was enough in this heatwave! *smile*
 
 
Danke fürs Gucken / thx for stopping by
Hugs
ToM

Montag, 22. August 2011

eine Rezeptkarte / a card by a receipt

Halli hallo zusammen!
Ich wünsche euch allen einen schönen Wochenanfang und hoffen wir, dass wir nicht zu sehr schwitzen werden die nächsten Tage!
Eine Karte nach einem Rezept war gefordert und zwar Farben.
Schwarz - Weiss - und noch eine Farbe.
Das hier ist nun bei mir herausgekommen.
Hi all!
I wish you all a great start this week!
A car by a color receipt was  asked.
Back - white  - and another color.
This here is now the result.
Danke fürs Gucken / thx for stopping by
Hugs
ToM

Freitag, 19. August 2011

einfache Männerkarte / simple manscard

Hallo Welt!
Ich habe jetzt eine einfache Männerkarte zum Zeigen. Nachdem ich ja jetzt stolzer Besitzer eine Cricut bin habe ich gleich Motive ausprobiert. Der Schriftzug und der Gecko sind mit der Cricut geschnitten.
Hi worl!
I can show you this time a simpe manscard. I got a Cricut new and i tried out a few motifs. The gecko and the words are cut with my Cricut.
Danke fürs Gucken / thx for stopping by
Hugs
ToM

Mittwoch, 17. August 2011

Vierfacheaslekarte / quadrupleeaslecard

Hallo meine Lieben!
Vielleicht gibt es das schon in den Weiten des Bloglandes aber gesehen habe ich es noch nicht.
Also Premiere -zumindest für mich!
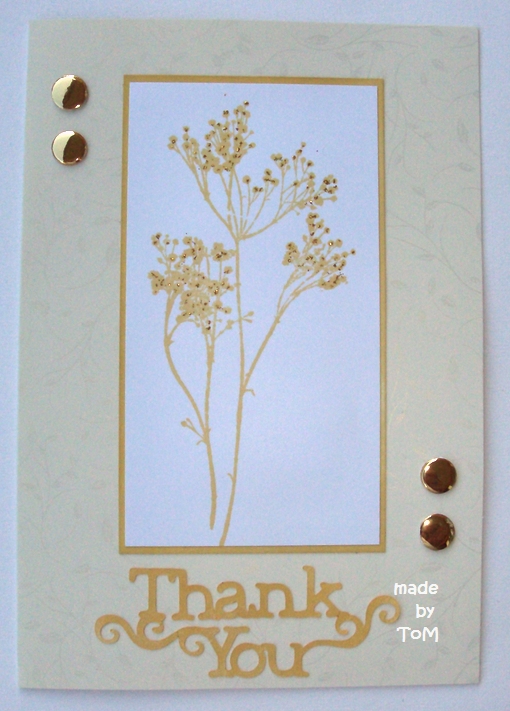
Ich zeige euch heute eine Vierfacheaslekarte!!
Natürlich ist das etwas aufwendiger in der Zeit aber ich finde es ist ein Hingucker.
Ich habe hierfür wieder kleine PennyBlackmotive verwendet und für die Rückseiten Sticker. Wobei wie man es stylt bleibt einem ja dann selber überlassen.
Hi my dear readers!
Maybe it ´s somewhere in the wideness of blogland but I didn´t seen it before.
So it is a premiere - at least for me!
I show you today a quadrupleeaslecard! Is that the right name for it? *smile*
Of course it takes more time to create that but it is an eyecatcher isn´t it?
I used again small motifs from PennyBlack and for the backside stickers. And of coures there are a lot of possibilities to style the card - it´s up to you how much time you have.

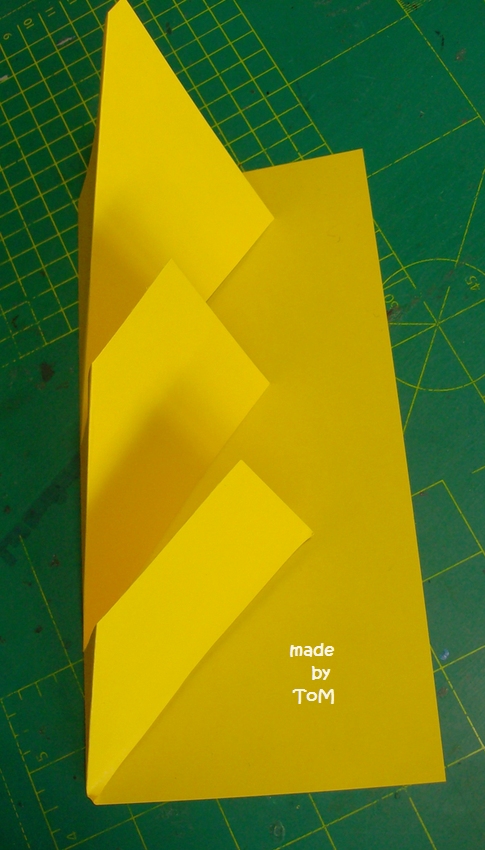
So sieht die Karte geschlossen aus - etwas seltsam nicht?
The card looks like that if it´s closed - a little bit funny

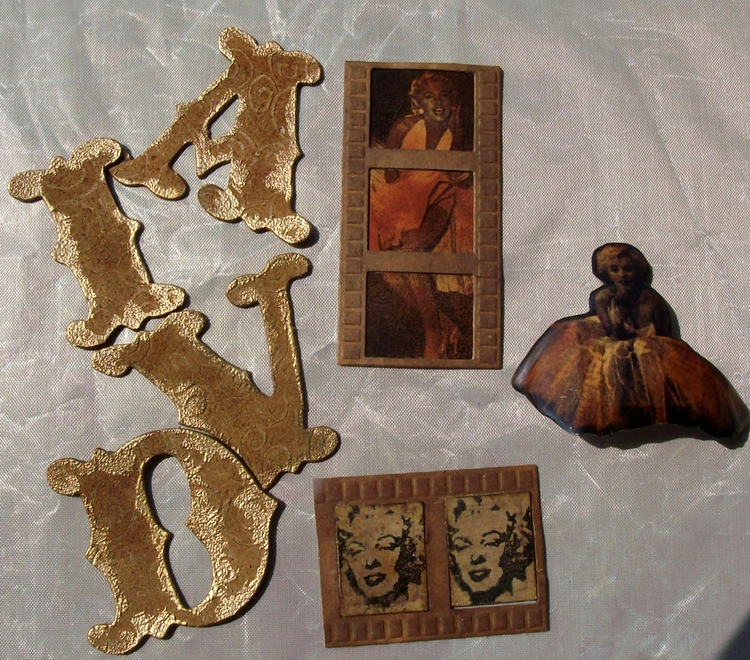
 Und hier Ansichten wenn sie geöffnet ist
and here photos when it´s open


Ich hoffe es gefällt euch und bei Bedarf kann ich ja auch ne Anleitung machen!
I hope you like it and if you want I can make a tutorial!
Danke fürs Gucken / thx for stopping by
Hugs
ToM

Dienstag, 16. August 2011

noch eine Trippletwistedeaslekarte / another trippletwistedeaslecard

Hallo zusammen!
Diesesmal habe ich eine andere Variante von dieser Karte gemacht. Die Motive sind wieder von PennyBlack und könnt ihr bei Kreativtiger bekommen.
Wie es funktioniert könnt ihr einen Post weiter unten sehen.
Hi all!
Thistime I have another variation of a trippletwistedeaslecard. The motifs are from PennyBlack again. I got mine from Kreativtiger.
 
 
Danke fürs Gucken / thx for stopping by
Hugs
ToM

Samstag, 13. August 2011

Anleitung Trippletwistedeaslekarte

Hallo zusammen!
Vorweg möchte ich sagen, dass ich das nicht erfunden habe.
Ich wollte euch mal eine einfache Anleitung für die Trippletwistedeaslekarte machen.
Es ist wirklich nicht so schwer wie es aussieht!!!
Ihr könnt das mit jeder Kartengrösse  machen.
Ich habe hier mit DIN lang Format gearbeitet.

Schneidet auf der einen Seite 3 gleich grosse Teile bis zur Mittelfaltz ein

 Dann faltet ihr den Mittelteil nochmals in der Mitte zur Mittelfaltz

Nun das obere Teil nach oben bis zur Mittelfaltz falten

Sieht dann so aus

 Das gleich machen wir mit dem unteren Teil - nach unten zur Mittelfaltz falten

 Sieht fertig etwas komisch aus

 Hier sind die Klebeflächen

Nun braucht ihr 3 Stück Cardstock in der Grösse wie eure 3 Unterteilungen sind

Kleben - fertig
Ganz einfach!!

 Ihr könnt auch die 3 Abschnitte unterschiedlich gross machen und nach oben falten

Viel Spass beim Nachbasteln!!

Dear readers!
I made this tutorial only in german. You can find a lot of english tutorials via Mr. Google! ;-)

Danke fürs Gucken
Hugs
ToM

Trippletwistedeaslecard

Hallo Welt!
Heute zeige ich euch eine Trippletwistedkarte.
Gesehen habe ich das in den Weiten des I-Net. Ich habe dafür das Format DIN lang genommen. Die niedlichen Mäusestempel sind von der Firma " Impression Obsession" und habe ich von KREATIVTIGER.
Ich habe alles mit ProMarkers coloriert, zusätzlich habe ich noch weissen Glitter und Flowersoft verwendet.Kleine Halbperlen halten die Teil beim Stehen.
Hi World!
Today I wann show you a trippletwistedeaslecard.
I saw this somewhere in the wide world of blogland.
This very cute micestamps are from the company " Impression Obsession" and I got them from KREATIVTIGER. Colored are the stamps with ProMarkers. Furthermore I used white glitter and white Flowersoft.
 

Danke fürs Gucken / thx for stopping by
Hugs
ToM

Donnerstag, 11. August 2011

For you!

Halli hallo!
Also nach diesem aufwendigem Projekt muss es doch wieder was niedliches sein.
Diesen PennyBlackstempel finde ich sehr lustig!
Coloriert ist wieder alles mit dem ProMarkers, der Hintergrund ist mit Kreide gewischt.
Den Stempel, die Balonstanze passende Stempel und das Embellishmet habe ich von Kreativtiger.
Hi all!
After my lavish projekt it neet to be a cute card.
This Pennyblackmotif I think it´s very funny!
Colored is everything with ProMarkers, the background is done with chalks.
The Stamp, the balloon die and the fit sentimentstamps and the embellishment I got from Kreativtiger.
 
Danke fürs Gucken / thx for stopping by
Hugs
ToM

Montag, 8. August 2011

fertiges Projekt Marylin / finished project Marylin

Halli hallo zusammen!
Es ist so weit - ich bin fertig. Und ich bin einfach stolz auf mein Werk!*ggg*
Leider kommen die Farben auf den Fotos sehr unterschiedlich rüber - sind sie aber nicht in Wirklichkeit.
Aber seht selber wie es jetzt aussieht und was ich alles verwendet habe.
Hi all!
Today is the day - I´m finished with my project. And I´m proud of my work!*ggg*
I´m sorry the colors look differently on the photos - in reality they are more harmonic.
But look yourself how it looks now and which things I used.


Danke fürs Gucken / thx for stopping by
Hugs
ToM

Projekt Marylin 3 / Project Marylin 3

Hallo Welt!
Hier nun der 3. Teil meines Projektes.
Ich habe jetzt die Buchstaben nochmals eingefärbt und Gold embosst. Ich habe mal wo gelesen, dass man das auch mit einem Kebestick machen kann. So sieht es damit aus - man kann es schön "gezielt" auftragen. Der Filmstreifen ist eine Stanze von Spellbinders, hinter den einem habe ich das gestempelte Bild geklebt und beim anderes habe ich die Ausstanzungen eingefärbt und bestempelt. Der andere Abdruck von Marylin ist komplett mit Klarsichtpulver embosst.
Hi World!
Here now the 3. part of my project.
The letters are now colored darker and it is embossed with gold. Somewhere I read that you can use a gluestick too. Here it is with the gluestick done. You can apply it more "exactly". The filmstrip is a die from Spellbinders. Behind one I  glue one of the stamped motifs and at the second one I stamped on the punched out parts.
The other motif of Marylin I covered completely with clear embossing powder.
Bis bald / cu soon
Hugs
ToM

Sonntag, 7. August 2011

Projekt Marylin 2 / project Marylin 2

Hallo meine Lieben!
Gestern habe ich also losgelegt!
Nach dem  einfärben mit den Distressfarben hatte ich dunkelbraune Finger. Also beim nächstenmal zieht der kluge Bastler Handschuhe an. *lach* Ich habe den ganzen Rahmen eingefärbt. Anschliessend habe ich darauf gestempel - leider ist das nicht so "toll" geworden wie ich mir das vorgestellt habe, denn die Oberfläche war nicht ganz glatt. Nun auch das werde ich beim Nächsten berücksichtigen.Wie ihr seht, habe ich mir die Stempelabdrücke und das Bild auch eingefärbt und einfach mal so hingelegt wie ich es mir vorstellen kann. Die Buchstaben brauchen auch noch eine "Behandlung". Aber diesesmal werde ich Handschuhe anziehen.
Wie es dann aussieht werde ich euch im nächsten Post wissen lassen.
Hi my dear readers!
So yesterday I started with my project!
After coloring all with the distressinks my fingers had been darkbrown. Next time the clever crafter will use
rubber gloves.*smile*. I colored the whole frame with the inks. Afterwards I stamped on it. Unfortunatley it didn´t work like I thought. The surface was not even enough - so for the next one I will keep an eye on it!
Then I colored the stamped images and the picture too. I positioned all on the frame as I think it will look good. Of course the letters need a "treatment" too. But this time I will use gloves!!
Next time I can show you more.
Danke fürs Gucken / thx for stopping by
Hugs
ToM

Samstag, 6. August 2011

Projekt "Marylin" 1 / project "Marylin" 1

Hallo Leute!
Für das Wochenende habe ich mir mal ganz was anders vorgenommen.
Viele von euch kennen doch diese Spiegel mit den Holzrahmen von Ikea.
Mit ein bischen Kreativität lässt sich sowas schön gestalten.
Von den Spiegeln habe ich einige gekauft und schon länger daheim. Und heute hat es sein sollen! So habe ich mal alles hergerichtet was ich denke, was ich brauchen könnte.
Und los gehts!
Hi folks!
For this weekend I will do something different.
In a furnhishing house I bought a few of this mirrors with a wooden frame.
With some love and creativity it´s possible to style that. And today is the day!
So I prepared a few things which I thought I will need and use.
Here we go!
Den nächsten Schritt zeige ich euch dann im nächsten Post.
The next step of my project you will find in the next post.
Danke fürs Gucken / thx for stopping by
Hugs
ToM

Donnerstag, 4. August 2011

2 Hochzeitskarten / 2 wedding cards

Hallo Leute!
Heute möchte ich euch 2 Hochzeitskarten zeigen.
Bei einer war gewünscht das man Geld reinstecken kann und sie sollte etwas edler aussehen.
Den Text habe ich am PC gedruckt.
Die 2. sollte etwas witziger sein. Das mit den 2 Herzen habe ich auf Blogs so gesehen.
Hi all!
Today I wanna show you 2 wedding cards.
The first card had to be more noble. Inside there is a pocket for the gift (money).
The wedding lyric I printed on the PC.
The second one had to be a little funny. So I do the 2 hearts - I saw this on blogs.
It´s very unusual and I like it.
 
 
Danke fürs Gucken / thx for stopping by
Hugs
ToM

Dienstag, 2. August 2011

Aufsätze für ProMarkers / Nib attachment for ProMarkers

Hallo zusammen!
Was für eine tolle Idee von Letraset!!
Es gibt jetzt für die ProMarkers eine Aufsatz womit man auch ganz feine Linien colorieren kann.
Einfach darauf stecken, etwas warten und die Tinte fließt. Ich habe mir für jede Farbgruppe einen genommen.
Die ProMarkers sind ja bei uns nicht so verbreitet - eher in England. Überzeugt hat mich der Preis - auch wenn es nicht so eine riesen Auswahl an Farbtönen wie bei den Copics gibt! Sind wir mal ehrlich - brauchen wir auch nicht.
Hi all!
What a great idea from Letraset!!
Now for the ProMarkers are nib attachemts available with an extra thin tip. You put them only over the marker tip, wait a few seconds - and go. I bought for all color groups one. ProMarkers are more popular in England than here in Austria, Germany,.. I was convinced about the price of the markers. They don´t have that great color choice like Copics - but to be honest - do we need so much?

"dicke" Linie ist mit der normalen Spitze gemacht - die dünne Linie mit dem Aufsatz
"thick" line is done with the normal tip - the thin line with the nib attachment
IST DAS EIN UNTERSCHIEDE ODER WAS?
ISN´T THAT A DIFFERENCE?
 Danke fürs Gucken / thx for stopping by
Hugs
ToM
Related Posts Plugin for WordPress, Blogger...